
Are you prepared to set out on a culinary adventure that will delight your taste buds with a delightful fusion of crunchiness and cheese? The ever-popular Cheese Straws are a savory snack that is ideal for any occasion, from festive gatherings to cozy evenings. In this article, we’ll reveal the techniques used to create these cheesy treats that deftly combine flavor and texture. So let’s get started making the ideal batch of Cheese Straws and indulge in some cheesy goodness!
Cheese Straws
Course: Cakes, Bakes and PastriesCuisine: BritishDifficulty: Easy20
servings30
minutes15
minutes134
kcal20
minutes1
hour5
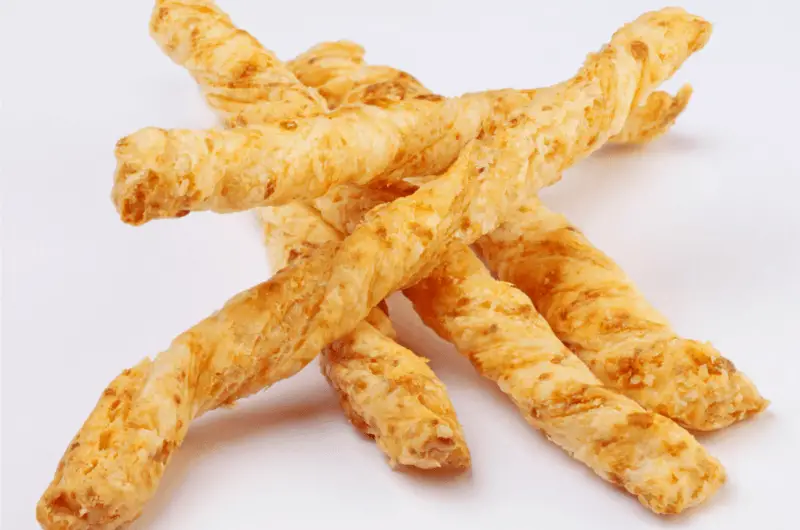
minutesThe tangy richness of cheese is combined with the gratifying crunch of a well-baked pastry to create the savory pastry delight known as Cheese Straws. These foods have roots in Southern cuisine and have since spread like wildfire around the world. Cheese Straws offer an explosion of flavors that appeal to all palates, whether they are served as an appetizer, party snack, or just a munch-worthy indulgence.
For an added spicy kick add some dried mustard and paprika, they just about finish of these crunchy cheesy sticks of delight.
Ingredients
400 g Puff Pastry (All butter)
115 g Mixed Hard Aged Cheese Mature Cheddar, Parmesan
1 tsp English mustard powder
1 tsp Paprika
Directions
- Heat the oven to 400°F/200°C/Gas Mark 6
- Line a Baking tray with Baking parchment, you don’t want the tray too large, as you are going to place it in the refrigerator to rest. If you have to use 2 trays that’s ok
- Grate the cheese fairly finely into a bowl
- Add the mustard powder and paprika and mix well
- Roll out the puff pastry to about 3 mm (⅛ of an inch) into a rectangle
- Sprinkle ⅓ of the cheese mix on a clean work surface and lay the rolled out pastry on top
- Sprinkly ½ of the remaining cheese mix over the pastry and using a rolling pin, roll the cheese and pastry just to press the cheese into the pastry.
- Fold the pastry in half and roll back out to 3 mm thick rectangle picking up any surplus cheese left on the work surface
- Sprinkle the remaining cheese mix over the rolled out pastry and again roll the pastry to press down the cheese
- Using a sharp knife or pizza cutter, cut the pastry lengthways into ½” strips.
- Take each strip one at a time and twist it as you lay it onto the baking tray
- When you have all pastry twisted and on the baking tray, place the baking tray in the fridge for 20 minutes to rest and firm up
- Bake in the oven for about 15 mins or until golden brown, if you are using 2 trays alternate them top to bottom halfway through baking
- Let them cool from the oven and munch away
Recipe Video
Conclusion
Making your own batch of Cheese Straws is a satisfying and delicious experience, to sum up. It’s difficult to resist the symphony of flavors that the combination of cheese and pastry produces. So get ready to roll up your sleeves, gather your ingredients, and savor the pleasure of creating these mouthwatering treats.
FAQs
Q: Can I substitute another type of cheese for this one?
Absolutely! Try out different cheeses to discover your favorite combination.
Q: Can I prepare the dough in advance?
Yes, you can make the dough ahead of time and chill it until you’re ready to bake.
Q: Do cheese straws fit special dietary requirements?
For a gluten-sensitive diet, you can look into gluten-free flour options.
Q: Do cheese straws fit special dietary requirements?
For a gluten-sensitive diet, you can look into gluten-free flour options.
Q: How should I keep cheese straws that are left over?
To keep them crisp, keep them in an airtight container.
Q: Can Cheese Straws be frozen for later use?
After baking, you can freeze them. Just give it a quick reheat in the oven before serving.
Cheese Straws are a wonderful treat to master whether you’re a seasoned chef or a kitchen novice. You’re sure to delight your taste buds and the taste buds of your fortunate guests with a little imagination and a lot of cheesy goodness. Take pleasure in the process, try different flavors, and savor each crispy bite! If you’re looking for Red Velvet Cake Recipe then our step-by-step guide will help you.