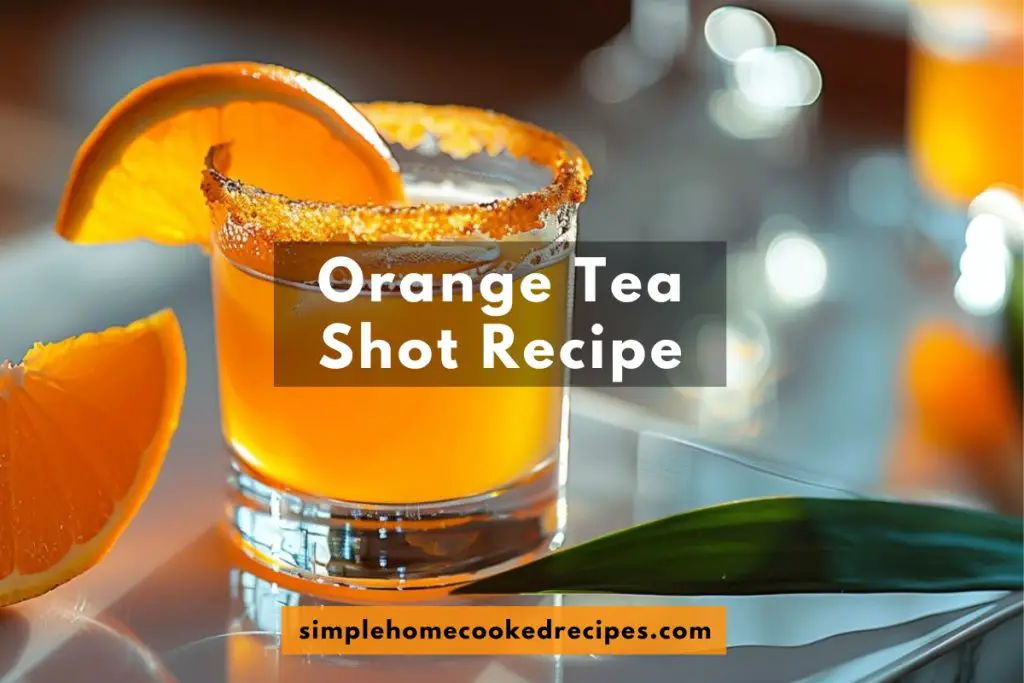
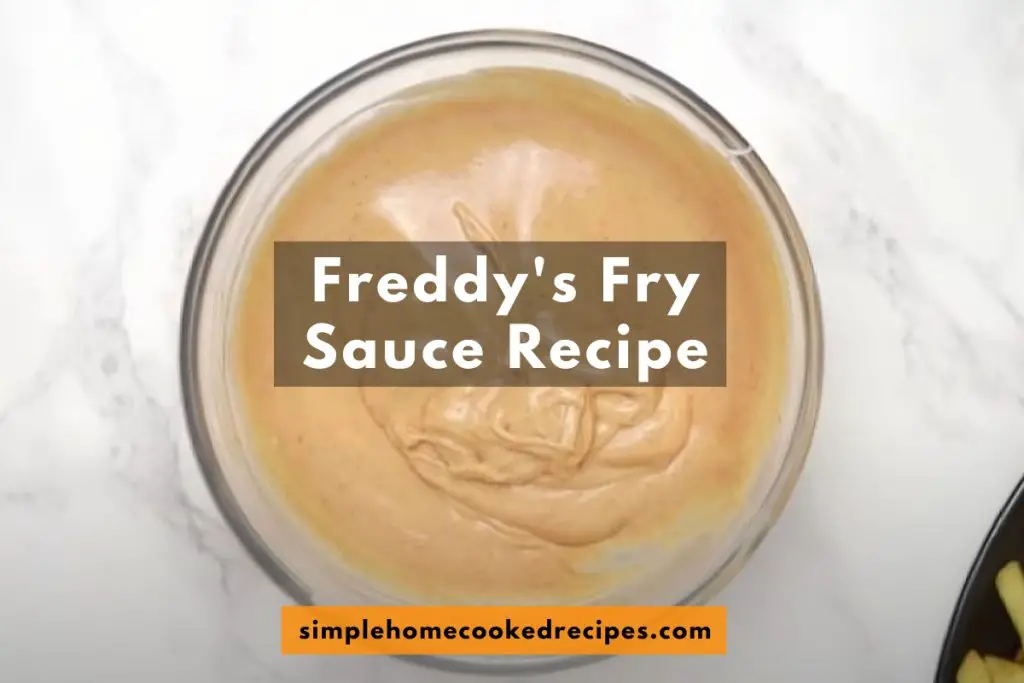
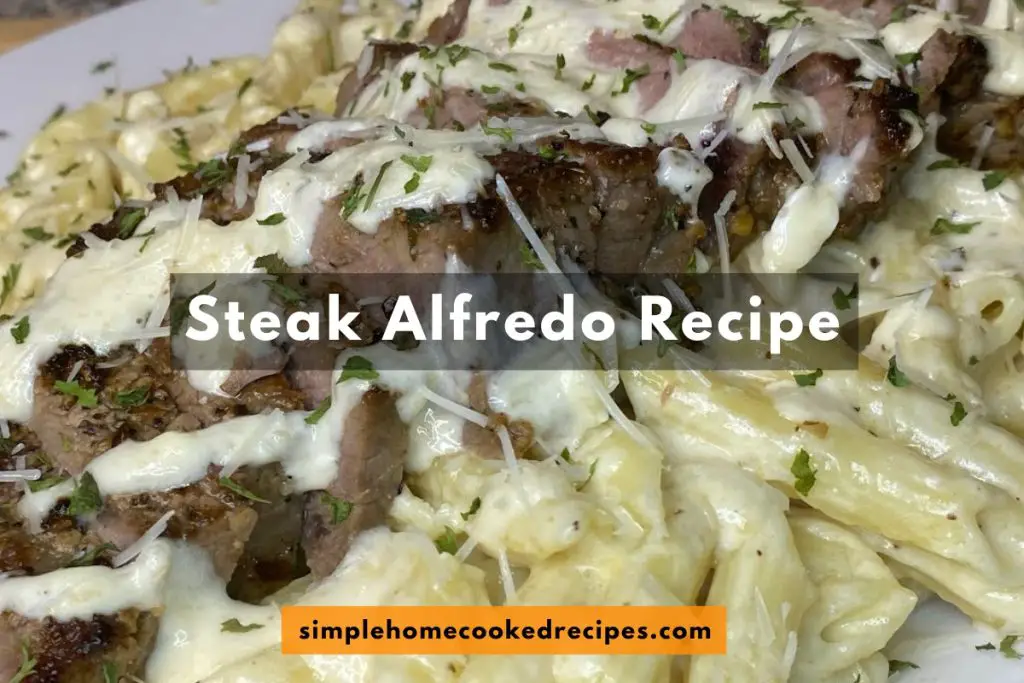
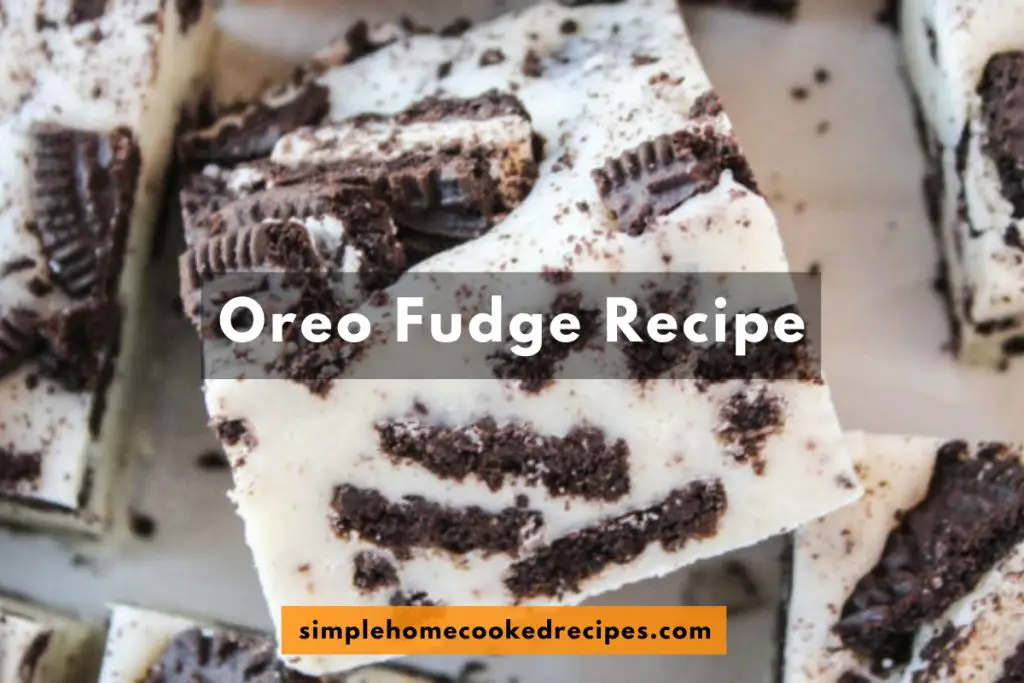
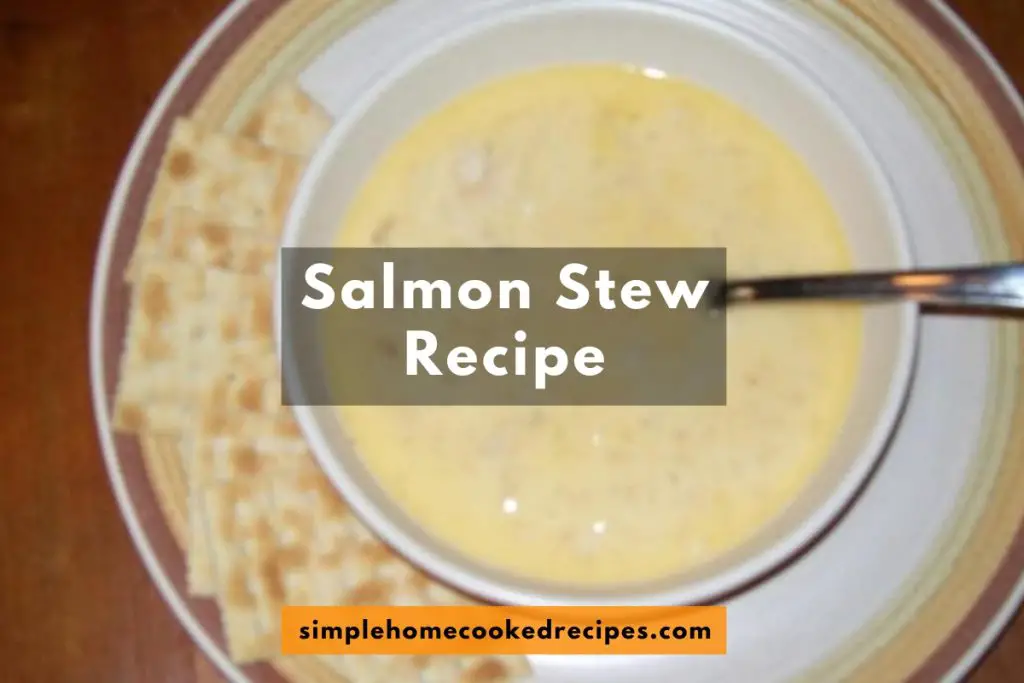
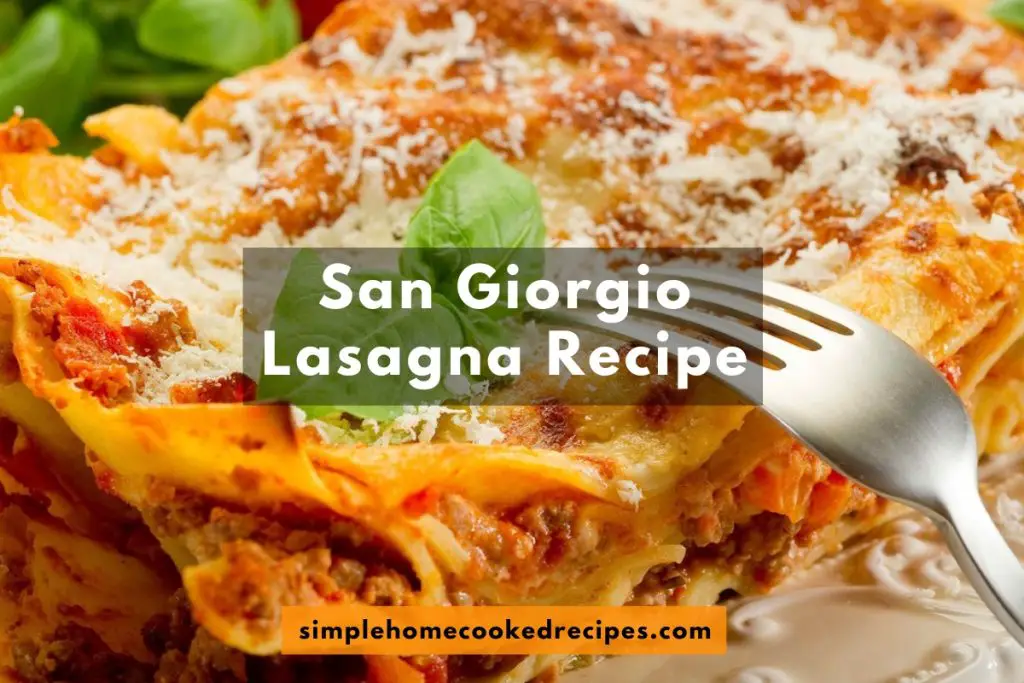
Orange Tea Shot Recipe

Orange Tea Shot Recipe is an alcohol recipe made with orange-flavored Irish whiskey, peach schnapps and sour mix. The combination of the zesty flavor of Jameson Orange Whiskey, the bright, sweet flavor of the peach schnapps and the tangy sour mix make this shot almost irresistible. The Orange Shots are delightful and refreshing way to spice up your weekends.
If you want to learn how to create this irresistible whiskey shot with a twist of citrus, you are at the right place!
Jameson Orange Tea Shot Recipe – Everything You Need To Know:
The Orange Tea Shot Recipe is made up of three main ingredients: orange flavored Irish whiskey, sour mix and peach schnapps. The shots can be prepared in just five minutes and served to a single individual as an alcoholic beverage. There are 90 calories per serving in this Orange Tea Shots Recipe.
Orange Tea Shots are a very popular choice of drink at bars and can be enjoyed with your favorite bar foods such as beer cheese dip and fried pickles. It can also be turned into a fancy cocktail such as an Orange Tea Martini.
Orange Tea Shot Ingredients
- 1/2 oz Orange Flavored Irish Whiskey: Orange-flavored Irish whiskey is the foundation of the shot and gives the shots their orange flavor. Jameson Orange Whiskey is usually preferred.
- 1/2 oz Peach Schnapps: Peach schnapps add a bright, peachy flavor to the alcoholic shots.
- 1/2 oz Sour Mix: This is a sweet lemon-lime cocktail mix that can be bought or made at home using fresh lemon juice, fresh lime juice, sugar, and water.
- 1/2 oz Lemon Lime Soda: Lemon-lime soda is used for a hint of bubbles and added flavor.
How To Make An Orange Tea Shot?
- Take a cocktail shaker and fill it up to the halfway mark with ice. Then, add the Irish whiskey, peach schnapps and sour mix.
- Shake the mixture thoroughly and then strain it into 1.5-ounce shot glasses.
- Add a splash of lemon-lime soda to the shots for extra flavor and fizz, as well as to fill the shot glasses.
Also Try: Freddy’s Fry Sauce Recipe

Tips To Make The Best Orange Tea Shots
Follow these tips and tricks for the best possible results on this Orange Tea Shot Recipe:
- Make sure to measure out the ingredients accurately in order to achieve the perfect balance in the drink.
- In order to create a fresher taste, make your own sweet and sour mix using fresh citrus juice.
- In order to make a batch of shots for a gathering or a party, multiply the ingredients equally.
- Make sure to add an orange slice as garnish to make the shot glass stand out.
Orange Tea Shot Recipe FAQs
What is an Orange Tea Shot made up of?
An Orange Tea Shot is made up of a mixture of orange flavored Irish whiskey, sour mix and peach schnapps. However, there is no actual tea present in the Orange Tea Shots.
What is the difference between a White Tea Shot, a Green Tea Shot and an Orange Tea Shot?
All three tea shots include peach schnapps as well as the sweet and sour mix, but differ in base spirits and colors. Orange Tea Shots are made with orange flavored Irish whiskey and have an orange hue. White Tea Shots are made with vodka and have a transparent white color. On the other hand, Green Tea Shots are made with Irish whiskey and have a color similar to green tea.
Do Orange Tea Shots taste like alcohol?
Orange Tea Shots may have some of the alcohol burn, but they do not overly taste like alcohol. This is because of the peach schnapps as well as the sweet and sour mix.
Orange Tea Shot Recipe Card
Orange Tea Shot Recipe
Course: DrinksCuisine: AmericanDifficulty: Easy1
servings5
minutes90
kcalIngredients
1/2 oz Orange Flavored Irish Whiskey
1/2 oz Peach Schnapps
1/2 oz Sour Mix
1/2 oz Lemon Lime Soda
Directions
- Take a cocktail shaker and fill it up to the halfway mark with ice. Then, add the Irish whiskey, peach schnapps and sour mix.
- Shake the mixture thoroughly and then strain it into 1.5-ounce shot glasses.
- Add a splash of lemon-lime soda to the shots for extra flavor and fizz, as well as to fill the shot glasses.
Recipe Video
Notes
- Orange Tea Shot can be stored in the refrigerator in an airtight container.
Nutrition Facts
1 servings per container
- Amount Per ServingCalories90
- % Daily Value *
- Total Fat
0.1g
1%
- Saturated Fat 0.1g 1%
- Trans Fat 0g
- Total Carbohydrate
8g
3%
- Dietary Fiber 0g 0%
- Total Sugars 8g
- Protein 0.01g 1%
* The % Daily Value tells you how much a nutrient in a serving of food contributes to a daily diet. 2,000 calories a day is used for general nutrition advice.
Freddy’s Fry Sauce Recipe

Freddy’s Fry Sauce Recipe is a copycat recipe for the delicious condiment served at Freddy’s Frozen Custard and Steakburgers. The restaurant is known for its smashburger-style burgers and thick creamy custard. However, what elevates these dishes is the fry sauce. The special dip sauce was originally introduced to use on Freddy’s fries but it also tastes great on steak-burgers.
Freddy’s Fry Sauce is a twist to the traditional ketchup, with the perfect balance of sweet and tangy making it ever so addictive. Thus, get ready to be hooked to this delicious dipping sauce!
Recipe For Freddy’s Fry Sauce – Everything You Need To Know:
The Freddy’s Fry Sauce Recipe consists of four main ingredients: mayonnaise, ketchup, pickle juice and seasoning. The recipe can be prepared in only five minutes and served to at least four individuals as a side. There are 126 calories per serving in this Freddy’s French Fry Sauce Recipe.
Freddy’s Fry Sauce can be used as a spread for burgers, sandwiches, tortillas or wraps. It can be used as a dipping sauce for french fries, onion rings, chicken wings, nuggets or chicken tenders. It can also be used as a salad dressing or as marinade for steak or chicken.
Ingredients For Freddy’s French Fry Sauce
- 1/2 cup Duke’s Mayonnaise: Mayonnaise brings creamy richness to the sauce. Any brand of mayo can be used, but Duke’s Mayonnaise is preferred.
- 3 tbsp Ketchup: The base of this sauce is ketchup, which adds a tangy and sweet flavor to balance it out on all levels.
- 1 tsp Lawry’s Seasoning Salt: Using Lawry’s Seasoning Salt or Freddy’s Fry Seasoning helps you create an exact replica of the original Freddy’s Fry Sauce Recipe.
- 1 tsp Pickle Juice: Pickle Juice or White Vinegar adds a hint of acidity and helps to balance out the sweetness of the ketchup.
How To Make Freddy’s Fry Sauce?
- Take a medium sized mixing bowl, add all the ingredients and whisk them together until combined thoroughly. The mixture should be uniform and smooth.
- Serve immediately or pour the fry sauce into an airtight container.
Also Try: Steak Alfredo Recipe

Tips To Make The Best Freddy’s Fry Sauce
Follow these tips and tricks for the best possible results on the Freddy’s Fry Sauce Recipe:
- For seasoning the sauce, you can use both Lawry’s Seasoning Salt or Freddy’s Fry Seasoning.
- Both pickle juice or white vinegar can be used as a part of this fry sauce recipe.
- Make sure to whip the ingredients till the mixture is uniform and smooth.
Freddy’s Fry Sauce Recipe FAQs
How long does Freddy’s French Fry Sauce last?
Freddy’s French Fry Sauce can be stored in the refrigerator for up to a month in an airtight container.
Do Freddy’s sell their fry sauce?
Yes, Freddy’s sell their french fry sauce on their website as well as on Amazon. However, this fry sauce is at least 3 times more expensive as compared to the homemade sauce.
Freddy’s Fry Sauce Recipe Card
Freddy's Fry Sauce Recipe
Course: SidesCuisine: AmericanDifficulty: Easy4
servings5
minutes126
kcalIngredients
1/2 cup Duke's Mayonnaise
3 tbsp Ketchup
1 tsp Lawry's Seasoning Salt
1 tsp Pickle Juice
Directions
- Take a medium sized mixing bowl, add all the ingredients and whisk them together until combined thoroughly. The mixture should be uniform and smooth.
- Serve immediately or pour the fry sauce into an airtight container.
Recipe Video
Notes
- Freddy's French Fry Sauce can be stored in the refrigerator for up to a month in an airtight container.
Nutrition Facts
4 servings per container
- Amount Per ServingCalories126
- % Daily Value *
- Total Fat
10g
13%
- Saturated Fat 2g 10%
- Trans Fat 0g
- Cholesterol 8mg 3%
- Sodium 439mg 20%
- Potassium 46mg 1%
- Total Carbohydrate
10g
4%
- Dietary Fiber 0.1g 1%
- Total Sugars 4.5g
* The % Daily Value tells you how much a nutrient in a serving of food contributes to a daily diet. 2,000 calories a day is used for general nutrition advice.
Steak Alfredo Recipe

Steak Alfredo Recipe is made with a rich, creamy sauce added to fettuccine pasta and topped with perfectly cooked slices of steak. The savory and cheesy Alfredo sauce is what makes this recipe so unique and delicious. The sauce goes into ribbon shaped fettuccine pasta and gives it a creamy texture. The steak is not only served with the pasta, but some is also cut into tiny bite-sized pieces and mixed right in to the creamy pasta.
The Steak Alfredo is the perfect fancy meal for a date night or any other special occasion. The combination of a juicy, tender steak paired with fettuccine pasta that is smothered in a creamy, rich homemade Alfredo sauce.
Recipe For Steak Alfredo – Everything You Need To Know:
The Steak Alfredo Recipe consists of four main ingredients: steak, fettuccine pasta, heavy cream and cheese. This recipe can be prepared in twenty five minutes and served as a main course to at least two individuals. There are 804 calories per serving in this Steak Alfredo Recipe.
Steak Alfredo can be served on its own as well as with wine along with a bunch of sides such as garlic bread, roasted veggies and a good salad.
Ingredients For Steak Fettuccine Alfredo Recipe
- 2 8 oz Steaks: Any cut of beef can be used, according to your personal preference and budget.
- 6 oz Fettuccine Pasta: Any type of pasta can be used, but Fettuccine Pasta is preferred.
- 3/4 cup Heavy Cream: Heavy cream is thicker than regular milk and thus gives the sauce a more creamy, rich texture.
- 1/2 cup Grated Parmesan Cheese: Buy a block of parmesan cheese and grate it for the best results.
- 3 tbsp Butter: Unsalted butter is preferred for this recipe.
How To Make Steak Fettuccine Alfredo?
- Boil the pasta in salted water for about 11 minutes or until al dente. Drain and set aside.
- While the pasta is boiling, preheat a skillet over medium high heat. Then, add butter.
- Season the steak generously with salt and pepper. Add to steak to the hot skillet and cook for 2 to 4 minutes or until caramelized and golden brown.
- Flip the steak and cook the other side. Cook the steak to your desired doneness. The steak is usually cooked until an internal temperature of 140°F-150°F is reached.
- Remove the steaks from the skillet, cover with foil and let them rest while preparing the sauce.
- Return the skillet to medium heat. Add the remaining butter, heavy cream, and parmesan cheese. Season with salt and pepper.
- Bring the sauce to a simmer and cook until the cheese is melted and sauce is slightly thickened, stirring frequently, for about 5 minutes.
- Add the drained pasta to the sauce and toss it around till the pasta is fully coated.
- Slice the steaks and serve over pasta.
Also Try: Chicken Salad Chick Broccoli Salad Recipe

Tips To Make The Best Steak Alfredo
Follow these tips and tricks for the best possible results on this Steak Alfredo Recipe:
- Make sure to choose the right cut of beef for your steak. It should be tender and have plenty of marbling. Rib-eye, and filet mignon are also great options.
- Make sure to reserve some starchy pasta water in case you need it to thin out the Alfredo sauce.
- Make sure the parmesan cheese is finely grated. Otherwise it won’t melt into the cream and you’ll end up with grainy sauce.
Steak Alfredo Recipe FAQs
How long does Steak Alfredo last?
Steak Alfredo can be stored in the refrigerator for up to 3 days in an airtight container. Make sure to cool the steak alfredo down properly before putting it in the refrigerator. Reheat in the microwave in 30 second bursts for the best results.
How many calories are in Steak Alfredo?
There are 804 calories per serving in this Steak Alfredo Recipe.
What can be served with Steak Alfredo?
Steak Alfredo can be served on its own as well as with wine along with a bunch of sides such as garlic bread, roasted veggies and a good salad.
Steak Alfredo Recipe Card
Steak Alfredo Recipe
Course: MainCuisine: AmericanDifficulty: Easy2
servings5
minutes20
minutes804
kcalIngredients
2 8 oz Steaks
6 oz Fettuccine Pasta
3/4 cup Heavy Cream
1/2 cup Grated Parmesan Cheese
3 tbsp Butter
Directions
- Boil the pasta in salted water for about 11 minutes or until al dente. Drain and set aside.
- While the pasta is boiling, preheat a skillet over medium high heat. Then, add butter.
- Season the steak generously with salt and pepper. Add to steak to the hot skillet and cook for 2 to 4 minutes or until caramelized and golden brown.
- Flip the steak and cook the other side. Cook the steak to your desired doneness. The steak is usually cooked until an internal temperature of 140°F-150°F is reached.
- Remove the steaks from the skillet, cover with foil and let them rest while preparing the sauce.
- Return the skillet to medium heat. Add the remaining butter, heavy cream, and parmesan cheese. Season with salt and pepper.
- Bring the sauce to a simmer and cook until the cheese is melted and sauce is slightly thickened, stirring frequently, for about 5 minutes.
- Add the drained pasta to the sauce and toss it around till the pasta is fully coated.
- Slice the steaks and serve over pasta.
Recipe Video
Notes
- Steak Alfredo can be stored in the refrigerator for up to 3 days in an airtight container.
Nutrition Facts
2 servings per container
- Amount Per ServingCalories804
- % Daily Value *
- Total Fat
47g
61%
- Saturated Fat 27g 135%
- Trans Fat 1g
- Cholesterol 152mg 51%
- Sodium 441mg 20%
- Potassium 492mg 11%
- Total Carbohydrate
61g
23%
- Dietary Fiber 3g 11%
- Total Sugars 5g
* The % Daily Value tells you how much a nutrient in a serving of food contributes to a daily diet. 2,000 calories a day is used for general nutrition advice.
Chicken Salad Chick Broccoli Salad Recipe

The Chicken Salad Chick Broccoli Salad Recipe is a quick salad recipe that is usually served as a side dish at the Chicken Salad Chick restaurants. The recipe consists of broccoli florets, crispy bacon, a creamy dressing and two types of shredded cheese. It is the perfect salad for any occasion and one of the most loved items on the Chicken Salad Chick menu.
The Chicken Salad Chick Broccoli Salad packs a punch of different flavors and textures, all in one dish. The combination of the crunchy broccoli, cheddar and mozzarella cheese tossed in a sweet and tangy dressing with crispy bacon on top makes this recipe so unique and mouthwatering.
Chicken Salad Chick Broccoli Salad Recipe – Everything You Need To Know:
Chicken Salad Chick Broccoli Salad Recipe consists of five main ingredients: broccoli florets, bacon, cheese, mayonnaise and vinegar. The recipe can be prepared in ten minutes, with a chilling time of one hour and served to at least twelve individuals. There are 320 calories per serving in this Chicken Salad Chick Broccoli Salad Recipe.
This salad is a great way to get your kids to eat veggies. The cheese and bacon are a perfect addition to the healthy broccoli. Not only that, but this delicious Chicken Salad Chick Broccoli Salad Recipe can only be made in ten minutes with minimal effort.
Chicken Salad Chick Broccoli Salad Ingredients
- 32 oz Broccoli Florets: Buy pre-chopped broccoli florets to make it easier for yourself.
- 8 oz Bacon: Chop the bacon into small pieces and cook till crunchy.
- 4 oz Cheddar Cheese: Shred the cheese directly from the block. If you are lactose intolerant, go for a dairy free brand of cheese.
- 4 oz Mozzarella Cheese: Shred the cheese from the block.
- 1 cup Mayonnaise: Duke’s Mayonnaise is recommended for the best flavors. However, any brand can be used.
- 1 tbsp Apple Cider Vinegar: Vinegar adds a tangy flavor to the salad dressing.
- 1/3 cup Sugar: Sugar will sweeten the salad dressing.
- Salt and Pepper: Add salt and pepper, according to your taste.
How To Make Chicken Salad Chick Broccoli Salad?
- Chop the bacon into bite-size pieces and cook in a large pan over medium heat until crisp. Drain on a paper towel-lined plate and set the bacon aside.
- Add salt to a large pot of water and bring it to a full boil. Then, add the broccoli florets to the boiling water and blanch for 60 seconds.
- Quickly drain and immediately transfer the broccoli florets to an ice bath.
- Place the florets into a salad spinner and spin dry. Spread the florets out on a baking sheet and pat them dry with paper towels to remove any remaining water.
- Now, take a large mixing bowl and add the mayonnaise, sugar and apple cider vinegar. Whisk until the mixture is uniform and smooth.
- Add the broccoli and toss it around well to coat with the mixture.
- Shred the cheddar and mozzarella cheese from the block. Stir in the shredded cheese, cover and chill for at least an hour.
- Top with the crumbled bacon right before serving.
Also Try: Cry Baby Noodles Recipe

Tips To Make The Best Chicken Salad Chick Broccoli Salad
Follow these tips and tricks for the best possible results on this Chicken Salad Chick Broccoli Salad Recipe:
- Make sure to blanch the broccoli for no longer than 60 seconds. If the broccoli is blanched for more than a minute, it will lose its crispy, tender snap and taste like soggy broccoli.
- The salad can also be made with just raw broccoli instead of blanching it. However, blanching the broccoli makes it easier to digest and neutralizes the bitter flavors.
- Make sure to dry the broccoli florets completely to prevent the salad from being soggy and and the broccoli from being floppy.
- Make sure to let the salad chill for at least an hour to let the flavors blend and the dressing has time to seep into the broccoli.
Chicken Salad Chick Broccoli Salad Recipe FAQs
How long can you store the Chicken Salad Chick Broccoli Salad for?
Chicken Salad Chick Broccoli Salad can be stored in the refrigerator for 3 to 4 days in an airtight container. However, it is not recommended to freeze the salad.
How many calories are in Chicken Salad Chick Broccoli Salad?
There are 320 calories per serving in the Chicken Salad Chick Broccoli Salad.
Chicken Salad Chick Broccoli Salad Recipe Card
Chicken Salad Chick Broccoli Salad Recipe
Course: Salads, SidesCuisine: AmericanDifficulty: Easy12
servings10
minutes1
minute320
kcalIngredients
32 oz Broccoli Florets
8 oz Bacon
4 oz Cheddar Cheese
4 oz Mozzarella Cheese
1 cup Mayonnaise
1 tbsp Apple Cider Vinegar
1/3 cup Sugar
Salt and Pepper
Directions
- Chop the bacon into bite-size pieces and cook in a large pan over medium heat until crisp. Drain on a paper towel-lined plate and set the bacon aside.
- Add salt to a large pot of water and bring it to a full boil. Then, add the broccoli florets to the boiling water and blanch for 60 seconds.
- Quickly drain and immediately transfer the broccoli florets to an ice bath.
- Place the florets into a salad spinner and spin dry. Spread the florets out on a baking sheet and pat them dry with paper towels to remove any remaining water.
- Now, take a large mixing bowl and add the mayonnaise, sugar and apple cider vinegar. Whisk until the mixture is uniform and smooth.
- Add the broccoli and toss it around well to coat with the mixture.
- Shred the cheddar and mozzarella cheese from the block. Stir in the shredded cheese, cover and chill for at least an hour.
- Top with the crumbled bacon right before serving.
Recipe Video
Notes
- Chicken Salad Chick Broccoli Salad can be stored in the refrigerator for 3 to 4 days in an airtight container.
Nutrition Facts
12 servings per container
- Amount Per ServingCalories320
- % Daily Value *
- Total Fat
27g
35%
- Saturated Fat 8g 40%
- Trans Fat 0.1g
- Cholesterol 37mg 13%
- Sodium 390mg 17%
- Potassium 296mg 7%
- Total Carbohydrate
11g
4%
- Dietary Fiber 2g 8%
- Total Sugars 7g
- Protein 9g 18%
* The % Daily Value tells you how much a nutrient in a serving of food contributes to a daily diet. 2,000 calories a day is used for general nutrition advice.
Cry Baby Noodles Recipe

Cry Baby Noodles Recipe is a spicy Asian noodle dish from Netflix’s Hunger movie, celebrated for it’s bold and fiery flavors. The dish is also known as “Pad Ngor Ngae”, which means crying. It is known that in Thailand, parents prepare this dish quickly when their children become hungry and cry. The noodles are unique due to the roller coaster of different tastes and textures, all within a single bowl. The dish consists of stir-fried vegetables, flavorful sauce, and the satisfying base of noodles.
This dish is not just a recipe, but a journey full of mouthwatering flavors. Starting from the aroma of the smoked Chinese sausage to the sweetness of the dried shrimp, each bite is a symphony of flavors. The flavors are further enhanced by the special sauce, consisting of XO sauce and miso paste.
Recipe For Cry Baby Noodles – Everything You Need To Know:
The Cry Baby Noodles Recipe consists of five main ingredients: fish cake, Chinese sausage, flat noodles, dried shrimp and a special sauce. The recipe takes about 35 minutes to prepare and can be served to at least two individuals. There are 320 calories per serving in this Cry Baby Noodles Recipe.
The Cry Baby Noodles can be served on their own or paired up with a variety of different dishes. Crispy spring rolls add a delightful crunch to the noodles. The noodles can also be paired with stir fried vegetables and mango sticky rice. In order to quench your thirst, add a Thai iced tea or a chilled beer along with the noodles.
Ingredients For Cry Baby Noodles Recipe
- 1/2 cup Fish Cake Tofu: Fish cake consists of fish fillet as well as other seafood.
- 1/2 cup Lap Cheong (Chinese Sausage): Lap Cheong is a Chinese dried, hard sausage made from pork and pork fat.
- 1/4 cup Dried Shrimps: Dried shrimp are shrimp that have been sun-dried and shrunk to a thumbnail size.
- 1 lb Flat Rice Noodles: Flat rice noodles are rolled flat and cut into thin strips.
- 2 Eggs: Eggs add flavor, texture and are visually pleasing.
- Onions and Minced Garlic: Onions and minced garlic add flavor and texture to the dish.
- Scallions: Add scallions on top of the dish for garnish.
For the sauce:
- 1 tbsp XO sauce: XO sauce is a spicy seafood sauce with umami flavors.
- 1 tbsp Miso Paste: Miso paste is a traditional Japanese seasoning.
- 1 tbsp Soy Sauce: Soy sauce adds extra depth and flavor to the dish.
- 1 tbsp Fish Sauce: Fish sauce is a staple seasoning in Asian cuisine.
- 1 tbsp Oyster Sauce: Oyster sauce is made from oysters and is both salty as well as sweet.
- 1/2 tbsp Sugar: Sugar balances out the umami flavors.
- Salt: Salt balances out the sweetness and adds more depth to the flavors of the sauce.
How To Make Cry Baby Noodles From Hunger?
- Cook the flat rice noodles according to the package instructions. Drain and set the noodles aside.
- In a small bowl, mix miso paste, XO sauce, soy sauce, fish sauce, oyster sauce, sugar, and a pinch of salt. Set the sauce aside as well.
- Now, take a large pan, fry the diced Lap Cheong and dried shrimps until it is fragrant.
- Add the fish cake or fried tofu puffs to the large pan. Stir in the onions and minced garlic. Cook until everything is lightly browned.
- Push all the ingredients to one side of the pan and scramble eggs on the empty side until cooked.
- Add the cooked rice noodles to the pan. Pour the prepared sauce over the noodles and toss everything together until it is well-coated with the sauce.
- Garnish with scallions and serve while it is still hot.
Also Try: Jammy Eggs Recipe

Tips To Make The Best Cry Baby Noodles
Follow these tips and tricks for the best possible results on this Cry Baby Noodles Recipe:
- If you are unable to find dried shrimps, you can also use fresh shrimps as a substitute. The XO sauce also has dried shrimps in it, so it will not cause much difference.
- Fry the Chinese sausage (Lap Cheong) in water instead of oil to prevent it from being dry and tough to chew. By the time water is evaporated, the oil from the sausage will come out. This results in a much more juicy sausage.
- Make sure to cook the eggs separately and then place them on top of the noodles before serving. This will result in a visually appealing dish.
Cry Baby Noodles Recipe FAQs
What is the origin of Cry Baby Noodles?
The Cry Baby Noodles can be traced back to the Sichuan province of China, where bold flavor and spicy dishes are preferred. It is believed that the dish was created by street food vendors seeking to satisfy the cravings of those seeking a bold and spicy culinary adventure.
What is the name of the noodle dish in the movie “Hunger”?
The noodle dish from the movie Hunger, which Aoy’s father prepared for his children, are called Pad Ngor Ngae or Cry Baby Noodles.
Can I add extra vegetables to the Cry Baby Noodles?
Yes, you can add your favorite vegetables such as bell peppers, peas etc, to enhance the flavors as well as the texture of the dish.
Cry Baby Noodles Recipe Card
Cry Baby Noodles Recipe
Course: MainCuisine: Asian, ThaiDifficulty: Easy2
servings15
minutes20
minutes320
kcalIngredients
1/2 cup Fish Cake Tofu
1/2 cup Lap Cheong (Chinese Sausage)
1/4 cup Dried Shrimps
1 lb Flat Rice Noodles
2 Eggs
Onions and Minced Garlic
Scallions
- For the sauce:
1 tbsp XO sauce
1 tbsp Miso Paste
1 tbsp Soy Sauce
1 tbsp Fish Sauce
1 tbsp Oyster Sauce
1/2 tbsp Sugar
Salt
Directions
- Cook the flat rice noodles according to the package instructions. Drain and set the noodles aside.
- In a small bowl, mix miso paste, XO sauce, soy sauce, fish sauce, oyster sauce, sugar, and a pinch of salt. Set the sauce aside as well.
- Now, take a large pan, fry the diced Lap Cheong and dried shrimps until it is fragrant.
- Add the fish cake or fried tofu puffs to the large pan. Stir in the onions and minced garlic. Cook until everything is lightly browned.
- Push all the ingredients to one side of the pan and scramble eggs on the empty side until cooked.
- Add the cooked rice noodles to the pan. Pour the prepared sauce over the noodles and toss everything together until it is well-coated with the sauce.
- Garnish with scallions and serve while it is still hot.
Recipe Video
Notes
- Cry Baby Noodles can be stored in the refrigerator for up to 4 days in an airtight container.
Nutrition Facts
2 servings per container
- Amount Per ServingCalories320
- % Daily Value *
- Total Fat
10g
13%
- Saturated Fat 3g 15%
- Trans Fat 0g
- Cholesterol 95mg 32%
- Sodium 870mg 38%
- Total Carbohydrate
45g
17%
- Dietary Fiber 2g 8%
- Total Sugars 3g
- Protein 12g 24%
* The % Daily Value tells you how much a nutrient in a serving of food contributes to a daily diet. 2,000 calories a day is used for general nutrition advice.
Jammy Eggs Recipe

Jammy Eggs Recipe is the perfect recipe in which eggs are boiled for 7 minutes to get a gooey, jam-like yolk and perfectly set egg whites. Jammy Eggs are in between the soft boiled and hard boiled eggs. Soft boiled eggs are boiled for 4-6 minutes, while hard boiled eggs are boiled for 10-12 minutes. However, the seven minute boiling time of this recipe results in a wonderful egg.
The eggs are known as ‘Jammy Eggs‘ because the texture of the egg is like when you open a jar of jam. It is kind of like a sticky, spoon-able texture. The center of the egg is not super runny, but it is also not set.
Jammy Eggs Recipe – Everything You Need To Know:
The Jammy Eggs Recipe consists of eggs as well as salt and pepper. The eggs take around 10 minutes to prepare, including the 7 minute boiling time to get the perfect, gooey jam-like yolk. There are 63 calories per serving in this Jammy Egg Recipe.
The Jammy Eggs can be served on their own with salt and pepper, or in a salad with all the greens. The eggs can also be put on top of an avocado toast for the perfect breakfast. It can be used in a breakfast taco or added to an egg salad.
Jammy Egg Recipe Ingredients
- 2 Eggs: Make sure to use high quality fresh eggs.
- Salt and Pepper: Sprinkle some salt and pepper on top of the egg for a better taste.
How To Make Jammy Eggs?
- Take a large pot and add enough water to cover the eggs. Bring it to a boil.
- Once the water is at a steady boil, carefully add in the eggs. Boil the eggs for exactly 7 minutes.
- While the eggs are boiling, fill a medium bowl halfway with water and add a handful of ice cubes.
- Remove the boiled eggs from the pot and immediately place in the ice bath for 2 minutes.
- Crack the eggs at one of the ends and try to get under the membrane beneath the shell.
- Cut the perfect soft boiled eggs in half. Add a sprinkle of salt and black pepper. Serve and enjoy!
Also Try: Oreo Fudge Recipe

Tips To Make The Best Jammy Eggs
Follow these tips and tricks for the best possible results on this Jammy Eggs Recipe:
- Make sure to keep a very close eye on the timer while boiling the eggs. Even a 30 seconds less or more can be a big difference. You could get a runny yolk or too solid yolk.
- Make sure to peel the eggs very gently. The egg whites will stay perfectly in tact if you peel the eggs very slowly and gently.
- Make sure you use high quality fresh eggs for the best results.
Jammy Eggs Recipe FAQs
Why is it called a Jammy Egg?
The eggs are known as ‘Jammy Eggs’ because the texture of the egg is like when you open a jar of jam. It is kind of like a sticky, spoon-able texture. The center of the egg is not super runny, but it is also not set.
How long do Jammy Eggs last?
Jammy Eggs can be stored in the refrigerator for about 2 days in an airtight container. When serving them, give the eggs a gentle warm-up in a bath of hot water to serve them at the right temperature.
How do I prevent eggs from cracking while boiling?
In order to prevent the eggs from cracking while boiling, add a little salt to the water in which the eggs are boiling.
Jammy Eggs Recipe Card
Jammy Eggs Recipe
Course: BreakfastCuisine: American, EnglishDifficulty: Easy1
servings3
minutes7
minutes63
kcalIngredients
2 Eggs
Salt and Pepper
Directions
- Take a large pot and add enough water to cover the eggs. Bring it to a boil.
- Once the water is at a steady boil, carefully add in the eggs. Boil the eggs for exactly 7 minutes.
- While the eggs are boiling, fill a medium bowl halfway with water and add a handful of ice cubes.
- Remove the boiled eggs from the pot and immediately place in the ice bath for 2 minutes.
- Crack the eggs at one of the ends and try to get under the membrane beneath the shell.
- Cut the perfect soft boiled eggs in half. Add a sprinkle of salt and black pepper. Serve and enjoy!
Recipe Video
Notes
- Jammy Eggs can be stored in the refrigerator for about 2 days in an airtight container. When serving them, give the eggs a gentle warm-up in a bath of hot water.
Nutrition Facts
1 servings per container
- Amount Per ServingCalories63
- % Daily Value *
- Total Fat
4g
6%
- Saturated Fat 1g 5%
- Trans Fat 0.02g
- Cholesterol 164mg 55%
- Sodium 63mg 3%
- Potassium 61mg 2%
- Total Carbohydrate
0.4g
1%
- Dietary Fiber 0g 0%
- Total Sugars 0.2g
- Protein 6g 12%
* The % Daily Value tells you how much a nutrient in a serving of food contributes to a daily diet. 2,000 calories a day is used for general nutrition advice.
Oreo Fudge Recipe

Oreo Fudge Recipe is the recipe for a sweet, creamy dessert packed with chunks of Oreo. Packed with cookies and cream flavor, this dessert will please all of your senses. The fudge has a delicate scent of chocolate and vanilla along with a rich flavor, creamy texture layered with chunky Oreo cookies. The absolutely fabulous presentation of the fudge is a cherry on top.
Oreo lovers will be licking their fingers just at the though of this Oreo Fudge. So, what are you waiting for? Scroll down and start making this delicious Oreo Fudge!
Recipe For Oreo Fudge – Everything You Need To Know:
The Oreo Fudge Recipe consists of three main ingredients: white chocolate chips, Oreo chunks and condensed milk. The recipe can be prepared in fifteen minutes, along with a three hour chilling time for the fudge to harden and stabilize. There are 234 calories per serving in this recipe for Oreo Fudge.
This 3 ingredients Oreo Fudge Recipe can be stored very easily. The fudge also freezes very well and keeps it texture and shape. However, make sure to slice, wrap, and store the portions individually so that the rest of the fudge doesn’t dry out prematurely
Ingredients For Oreo Fudge Recipe
- 3 cups White Chocolate Chips: Get high quality white chocolate chips as the chocolate needs to melt properly for best results.
- 2 1/2 cups Oreo Cookie Pieces: The Oreo Cookie bits are the most crucial ingredient in this 3 ingredient Oreo Fudge Recipe. Do not make the Oreo bits too small.
- 14 oz Condensed Milk: Condensed milk helps to get a deep, decadent, and creamy consistency.
How To Make Oreo Fudge?
- Take a 8×8 inch baking dish and line it with parchment paper or foil.
- Now, take a large non-stick saucepan and combine the white chocolate chips and condensed milk over medium low heat. Stir gently until the chocolate melts and the mixture is uniform and smooth.
- Remove the saucepan from the heat and stir in 2 cups of Oreo cookie pieces and a small pinch of salt.
- Pour the fudge into the prepared baking dish, scraping the pan with a spatula to get out any stuck fudge and then spread it into an even layer.
- Sprinkle the remaining half cup of Oreo pieces over the top of the fudge and gently press them into the fudge with a spatula so they don’t fall out.
- Allow the fudge to cool down at room temperature for at least one hour before transferring the fudge to the refrigerator for at least two hours or until it is set.
- Once set, remove the Oreo fudge from the dish and cut it into squares with a sharp knife.
Also Try: Salmon Stew Recipe

Tips To Make The Best Oreo Fudge
Follow these tips and tricks for the best possible results on this Oreo Fudge Recipe:
- Make sure the baking dish is lined with parchment paper. This allows the fudge to be removed from the baking dish much easier.
- Make sure to use high quality white chocolate chips.
- Make sure not to chop up the Oreos too finely on the cutting board. Cut each Oreo into about 4 to 6 pieces with a sharp knife.
Oreo Fudge Recipe FAQs
What is the Oreo Fudge filling made up of?
The Oreo Fudge filling is made up of white chocolate chips, Oreos broken into small pieces and condensed milk. All these ingredients are mixed up to form a uniform, smooth filling.
How many calories are in Oreo Fudge?
There are 234 calories per serving in the White Chocolate Oreo Fudge.
How long does it take to harden the fudge?
It usually takes about 3 hours to harden the Oreo Fudge in order to maintain its integrity and texture. Allow it to cool down at room temperature for an hour and then refrigerate the fudge for another two hours. This is the best way to prevent the sugar from crystallizing and making the fudge dry and crumbly.
Oreo Fudge Recipe Card
Oreo Fudge Recipe
Course: DessertCuisine: AmericanDifficulty: Easy25
servings10
minutes5
minutes234
kcal3
minutes3
hours15
minutesIngredients
3 cups White Chocolate Chips
2 1/2 cups Oreo Cookie Pieces
14 oz Condensed Milk
Directions
- Take a 8x8 inch baking dish and line it with parchment paper or foil.
- Now, take a large non-stick saucepan and combine the white chocolate chips and condensed milk over medium low heat. Stir gently until the chocolate melts and the mixture is uniform and smooth.
- Remove the saucepan from the heat and stir in 2 cups of Oreo cookie pieces and a small pinch of salt.
- Pour the fudge into the prepared baking dish, scraping the pan with a spatula to get out any stuck fudge and then spread it into an even layer.
- Sprinkle the remaining half cup of Oreo pieces over the top of the fudge and gently press them into the fudge with a spatula so they don’t fall out.
- Allow the fudge to cool down at room temperature for at least one hour before transferring the fudge to the refrigerator for at least two hours or until it is set.
- Once set, remove the Oreo fudge from the dish and cut it into squares with a sharp knife.
Recipe Video
Notes
- White Chocolate Oreo Fudge can be stored in the refrigerator for up to three weeks in an airtight container.
Nutrition Facts
25 servings per container
- Amount Per ServingCalories234
- % Daily Value *
- Total Fat
11g
15%
- Saturated Fat 6g 30%
- Trans Fat 0g
- Cholesterol 10mg 4%
- Sodium 95mg 5%
- Total Carbohydrate
32g
12%
- Dietary Fiber 27g 97%
- Total Sugars 1g
- Protein 3g 6%
* The % Daily Value tells you how much a nutrient in a serving of food contributes to a daily diet. 2,000 calories a day is used for general nutrition advice.
Salmon Stew Recipe

Salmon Stew Recipe is the traditional recipe for fish stew involving salmons. This is the easiest and quickest way to make salmon stew. It involves five ingredients that are easy to find and inexpensive. Thus, in just twenty minutes, dinner will be at your table.
There are different ways to eat salmon. However, salmon stew is one of the best ways to devour your favorite fish. The stew brings out all the flavors of the salmon with a rich, creamy consistency. Moreover, using a milk bath, the flavor of salmon in the stew is not too much and just the right amount.
Recipe For Salmon Stew – Everything You Need To Know:
The Salmon Stew Recipe consists of four main ingredients: salmon, evaporated milk, water and butter. The recipe can be prepared in just twenty minutes and served to at least six individuals. There are 370 calories per serving in this Salmon Fish Stew Recipe.
There are different variations to this recipe. Starch can be used to thicken the Salmon Stew. Mix in the starch together with some sauteed vegetables in order to thicken the stew. All-purpose flour can also be used for this purpose. Moreover, chopped parsley can be used as garnish.
Ingredients For Salmon Stew Recipe
- 10 oz Skinless Boneless Pink Salmon: Pink Salmon is the main ingredient for Salmon Stew Recipes. However, Halibut, sea bass, shrimp, and artic char can also be used instead of salmon.
- 24 oz Evaporated Milk: Evaporated milk lessens the strong flavor of the salmon.
- 3 cups Water: Water makes the salmon stew less thick.
- 2 tbsp Butter: Butter gives the stew a creamy, rich taste.
- Salt and Pepper: Use as seasoning, according to your taste.
How To Make Salmon Stew?
- Take a medium sized pot and pour both cans of salmon along with the juices in it. Break them up.
- Pour in the canned milk, water, butter, salt and pepper. Stir all the ingredients together.
- Cook on medium heat stirring constantly for approximately 20 minutes. Do not allow to boil or the milk will curdle.
- Once the butter melts and tiny bubbles start to form around the edges then it is finished and ready to serve.
- Enjoy the Salmon Stew!
Also Try: Kolache Cookie Recipe

Salmon Stew Recipe FAQs
How long can you store Salmon Stew for?
Salmon Stew can be stored in the refrigerator for 3 to 4 days in an airtight container. Make sure to cool it down properly before putting it in the refrigerator.
Can you freeze Salmon Stew?
Salmon Stew can be frozen and stored in the freezer for 4 to 6 months. However, this stew does not freeze perfectly and the texture changes after reheating.
Can I substitute another fish for Salmon?
Salmon can be substituted for other fish in this Salmon Stew Recipe. Halibut, sea bass, shrimp, and artic char can be used instead of salmon.
How to thicken Salmon Stew?
Starch can be used to thicken the Salmon Stew. Mix in the starch together with some sauteed vegetables in order to thicken the stew. All-purpose flour can also be used for this purpose.
Salmon Stew Recipe Card
Salmon Stew Recipe
Course: Main Course, SoupsCuisine: AmericanDifficulty: Easy6
servings5
minutes15
minutes370
kcalIngredients
10 oz Skinless Boneless Pink Salmon
24 oz Evaporated Milk
3 cups Water
2 tbsp Butter
Salt and Pepper
Directions
- Take a medium sized pot and pour both cans of salmon along with the juices in it. Break them up.
- Pour in the canned milk, water, butter, salt and pepper. Stir all the ingredients together.
- Cook on medium heat stirring constantly for approximately 20 minutes. Do not allow to boil or the milk will curdle.
- Once the butter melts and tiny bubbles start to form around the edges then it is finished and ready to serve.
- Enjoy the Salmon Stew!
Recipe Video
Notes
- Salmon Stew Recipe can be stored in the refrigerator for 3 to 4 days in an airtight container.
Nutrition Facts
6 servings per container
- Amount Per ServingCalories370
- % Daily Value *
- Total Fat
56g
72%
- Saturated Fat 14g 70%
- Trans Fat 8g
- Cholesterol 68mg 23%
- Sodium 280mg 13%
- Total Carbohydrate
33g
12%
- Dietary Fiber 1g 4%
- Total Sugars 25g
- Protein 28g 57%
* The % Daily Value tells you how much a nutrient in a serving of food contributes to a daily diet. 2,000 calories a day is used for general nutrition advice.
Kolache Cookie Recipe

Kolache Cookie Recipe is a traditional Polish cookie recipe that is generally made around the Christmas time. The Kolache cookies are made with cream cheese dough filled with any fruit-flavored jam and topped with powder sugar. Kolaczki is popular in Poland, Czech Republic, Russia, Austria and Denmark.
The Kolache Cookies have a soft and flaky outer portion, with your favorite fruit jam filling inside and topped with confectioner’s sugar. A variety of fillings can be used, from fruit jams, preserves, figs, nuts, sweet cheese, or poppy seeds.
Recipe For Kolache Cookies – Everything You Need To Know:
Kolache Cookie Recipe consists of five main ingredients: flour, butter, sugar, cream cheese and fruit flavored jam. The recipe can be prepared in twenty five minutes, along with a two hour rest time. There are 154 calories per serving in this Kolache Cookie Recipe.
There can be different variations in the Kolache Cookies. Some recipes are made with yeast, while some are made with cream cheese. Some cookies are squares with the corners tucked up, while some are round.
Ingredients For Kolache Cookie Recipe
- 1 1/3 cup Flour: All-purpose flour works best for this recipe.
- 115 g Softened Butter: Use unsalted butter and not margarine.
- 115 g Cream Cheese: Use whole fat cream cheese for a creamy, rich taste.
- 1 tbsp Granulated Sugar: Use granulated sugar or caster sugar for the Kolache Cookies Recipe.
- 1/2 tsp Salt: Salt balances out the sweetness of the jam.
- 14 tsp Jam: Any type of jam can be used, based on your preference.
How To Make Kolache Cookies?
- Take a medium mixing bowl and add the butter, cream cheese, granulated sugar and salt. Using an electric hand mixer, mix the ingredients until the mixture is creamy and smooth.
- Add the flour in gradually, a third at a time and mix until just combined.
- Form the dough into a disk, and wrap it with plastic wrap. Put the dough in the fridge for at least 3 hours to firm up.
- Preheat the oven to 350°F and line up a baking sheet with parchment paper.
- Once the dough is firm, roll the dough onto a lightly floured surface. Roll it to a uniform thickness of 1/4 to 1/8 inch thick.
- Trim the edges off the dough and then, using a knife or pizza cutter, cut it in to squares about 2 & ½-inches square.
- Top each dough square with about a teaspoon of jam. Dab a small amount of water between the two edges, and seal the corners together by pressing the two edges firmly together to prevent the dough from opening in the oven.
- Place the cookies on the baking sheet and bake for 15 minutes or until the tops are golden brown.
- Allow the cookies to cool down on the wire rack and then, dust with confectioner’s sugar before serving.
Also Try: San Giorgio Lasagna Recipe

Tips To Make The Best Kolache Cookies
Follow these tips and tricks for the best possible results on this Kolache Cookie Recipe:
- Make sure to use room temperature ingredients. This step helps the dough become uniform and smooth.
- Do not over-mix the batter of the cookies. Over-mixing the batter will lead to dry and rough cookies instead of moist, soft cookies.
- Make sure to use a kitchen scale and measure out all the ingredients properly.
- Make sure the butter is at room temperature before adding it to the dough. Adding cold butter to the dough will leave lumps of it in the dough when mixing.
- Make sure to line the baking sheet with parchment paper. This will prevent the cookies from sticking to the baking sheet.
- Make sure to chill the dough for at least a couple of hours. This will prevent the cookies from spreading out too much.
Kolache Cookie Recipe FAQs
What is a Kolache dough made up of?
Kolache dough is made up of flour, granulated sugar, cream cheese, softened butter and salt. All these ingredients are creamed together until the mixture is soft and creamy.
How long can you store Kolache Cookies for?
Kolache Cookies can be stored in the refrigerator for up to 5 days in an airtight container. Allow the cookies to cool down completely on the wire rack before placing them in an airtight container or resealable bag.
Why is my Kolache dough sticky?
There are a few possible reasons for the dough being too sticky. One of the reasons is the butter is too warm when adding to the dough. The butter should be at room temperature. Another reason is not allowing the dough to chill in the fridge for long enough.
Kolache Cookie Recipe Card
Kolache Cookie Recipe
Course: DessertCuisine: PolishDifficulty: Easy14
servings10
minutes15
minutes154
kcal2
minutes2
hours25
minutesIngredients
1 1/3 cup Flour
115 g Softened Butter
115 g Cream Cheese
1 tbsp Granulated Sugar
1/2 tsp Salt
14 tsp Jam
Directions
- Take a medium mixing bowl and add the butter, cream cheese, granulated sugar and salt. Using an electric hand mixer, mix the ingredients until the mixture is creamy and smooth.
- Add the flour in gradually, a third at a time and mix until just combined.
- Form the dough into a disk, and wrap it with plastic wrap. Put the dough in the fridge for at least 3 hours to firm up.
- Preheat the oven to 350°F and line up a baking sheet with parchment paper.
- Once the dough is firm, roll the dough onto a lightly floured surface. Roll it to a uniform thickness of 1/4 to 1/8 inch thick.
- Trim the edges off the dough and then, using a knife or pizza cutter, cut it in to squares about 2 & ½-inches square.
- Top each dough square with about a teaspoon of jam. Dab a small amount of water between the two edges, and seal the corners together by pressing the two edges firmly together to prevent the dough from opening in the oven.
- Place the cookies on the baking sheet and bake for 15 minutes or until the tops are golden brown.
- Allow the cookies to cool down on the wire rack and then, dust with confectioner’s sugar before serving.
Recipe Video
Notes
- Kolache Cookies can be stored in the refrigerator for up to 5 days in an airtight container.
Nutrition Facts
14 servings per container
- Amount Per ServingCalories154
- % Daily Value *
- Total Fat
10g
13%
- Saturated Fat 6g 30%
- Trans Fat 1g
- Cholesterol 26mg 9%
- Sodium 164mg 8%
- Potassium 31mg 1%
- Total Carbohydrate
15g
6%
- Dietary Fiber 1g 4%
- Total Sugars 5g
- Protein 3g 6%
* The % Daily Value tells you how much a nutrient in a serving of food contributes to a daily diet. 2,000 calories a day is used for general nutrition advice.
San Giorgio Lasagna Recipe

San Giorgio Lasagna Recipe is a classic Italian dish made with several layers of lasagna noodles, savory meat sauce and creamy cheese mixture. This old fashioned Lasagna dish is creamy, meaty, bubbly and delicious. It can easily become your family’s comfort meal as it can be made before hand, stored and reheated multiple times.
The lasagna is made with San Giorgio Lasagna Pasta, which is always reliable, tasty and the layers hold up more often than not. This recipe will help you make the most delicious, mouthwatering, and downright fantastic lasagna you’ve ever tasted.
San Giorgio Lasagna Box Recipe – Everything You Need To Know:
San Giorgio Lasagna Recipe consists of the four main ingredients: lasagna pasta, ground beef, pasta sauce and a good mix of different types of cheese. The recipe can be prepared in fifty minutes and be served to at least 12 individuals. There are 377 calories per serving in this San Giorgio Lasagna Recipe.
Lasagna pairs up very well with a variety of side dishes such as garlic bread, crisp green salad or steamed vegetables such as broccoli, carrots, and cauliflower.
Ingredients For San Giorgio Lasagna Recipe
- 8 oz San Giorgio Lasagna Pasta: Buy the original San Giorgio Lasagna Pasta.
- 1 lb Ground Beef: Ground beef makes up for a juicier lasagna.
- 4 cups Mozzarella Cheese: Make sure to shred a block of mozzarella cheese yourself instead of buying pre-grated cheese.
- 2 cups Pasta Sauce: Buy pre-made pasta sauce or make your own pasta sauce from tomato sauce.
- 15 oz Ricotta Cheese: Ricotta cheese is part of the traditional Italian lasagna recipe.
- 3 tbsp Grated Parmesan Cheese: Make sure to shred a block of parmesan cheese yourself instead of buying pre-grated cheese.
- 1 Egg: Egg helps bind the ricotta cheese so it does not ooze out of the lasagna.
How To Make San Giorgio Lasagna?
- Firstly, cook the pasta according to the directions on the package. Drain and lay the pasta flat to cool.
- Heat the oven to 375° F.
- Now, take a large skillet, add meat and cook until it becomes brown in color. Add in the ingredients and the pasta sauce.
- Take another skillet and add the ricotta cheese, one cup of mozzarella cheese, parmesan cheese, and the egg. Mix the ingredients thoroughly, Add salt and pepper to taste.
- Now, to assemble the lasagna, take a large baking dish and spread half a cup of sauce on the dish.
- Place three pieces of pasta lengthwise over the sauce. Spread half of the ricotta mixture over the pasta and cover it with one cup of ground meat.
- Repeat the steps by adding more layers of pasta, ricotta mixture, and ground meat. Top it up with the remaining pasta, ground meat, and mozzarella cheese.
- Cover the baking dish with foil and bake for 20 to 25 minutes. Remove the foil and bake for 10 minutes more or until it is nice and bubbly.
Also Try: Leche de Tigre Recipe

Tips To Make The Best San Giorgio Lasagna
Follow these tips and tricks for the best possible results on this San Giorgio Lasagna Recipe:
- Make sure to distribute each layer evenly when layering the lasagna.
- Spread the sauces and cheese mixture with the back of a spoon to make sure they cover the entire surface area of the lasagna.
- Make sure to allow the lasagna to rest for at least 10 to 15 minutes before serving. This allows the layers to be set and makes it easier to slice into neat portions.
- Make sure to garnish the lasagna with fresh herbs for added aroma, texture and flavor.
San Giorgio Lasagna Recipe FAQs
How long can you store the San Giorgio Lasagna for?
San Giorgio Lasagna can be stored in the refrigerator for 3 to 4 days in an airtight container. However, make sure the lasagna is cooled down before putting it in the refrigerator.
How do I prevent my lasagna from being watery?
In order to prevent lasagna from being watery, make sure to drain the excess grease from the meat sauce and also squeeze out the extra moisture from the ricotta cheese.
Can I make San Giorgio Lasagna without meat?
Yes, San Giorgio Lasagna can be made without meat entirely and substituted with vegetables such as mushrooms, spinach, or roasted bell peppers.
San Giorgio Lasagna Recipe Card
San Giorgio Lasagna Recipe
Course: Main CourseCuisine: ItalianDifficulty: Easy12
servings20
minutes30
minutes377
kcalIngredients
8 oz San Giorgio Lasagna Pasta
1 lb Ground Beef
4 cups Mozzarella Cheese
2 cups Pasta Sauce
15 oz Ricotta Cheese
3 tbsp Grated Parmesan Cheese
1 Egg
Directions
- Firstly, cook the pasta according to the directions on the package. Drain and lay the pasta flat to cool.
- Heat the oven to 375° F.
- Now, take a large skillet, add meat and cook until it becomes brown in color. Add in the ingredients and the pasta sauce.
- Take another skillet and add the ricotta cheese, one cup of mozzarella cheese, parmesan cheese, and the egg. Mix the ingredients thoroughly, Add salt and pepper to taste.
- Now, to assemble the lasagna, take a large baking dish and spread half a cup of sauce on the dish.
- Place three pieces of pasta lengthwise over the sauce. Spread half of the ricotta mixture over the pasta and cover it with one cup of ground meat.
- Repeat the steps by adding more layers of pasta, ricotta mixture, and ground meat. Top it up with the remaining pasta, ground meat, and mozzarella cheese.
- Cover the baking dish with foil and bake for 20 to 25 minutes. Remove the foil and bake for 10 minutes more or until it is nice and bubbly.
Recipe Video
Notes
- San Giorgio Lasagna can be stored in the refrigerator for 3 to 4 days in an airtight container.
Nutrition Facts
12 servings per container
- Amount Per ServingCalories377
- % Daily Value *
- Total Fat
23g
30%
- Saturated Fat 11g 56%
- Trans Fat 0g
- Cholesterol 89mg 30%
- Total Carbohydrate
32g
12%
- Dietary Fiber 4g 15%
- Total Sugars 11g
- Protein 23g 46%
* The % Daily Value tells you how much a nutrient in a serving of food contributes to a daily diet. 2,000 calories a day is used for general nutrition advice.
